Sunday, September 30, 2012

Baby Shower DIY

Simple stuff that you can make for a baby shower or any party! Here are some that I made for my baby shower and my friend's.


Fabric tassle backdrop for the Photo booth 


Very simple. Follow these 5 steps: 

1. Snip your fabric whatever width you like. Mine was an inch. 
2. Tear the fabric straight down using your hands to give a frayed look. It might not end up being straight, but it looks better that way. 
3. Tie the strips to a string. 
4. Tie knots at both ends of the string. 
5. Hang it up. 


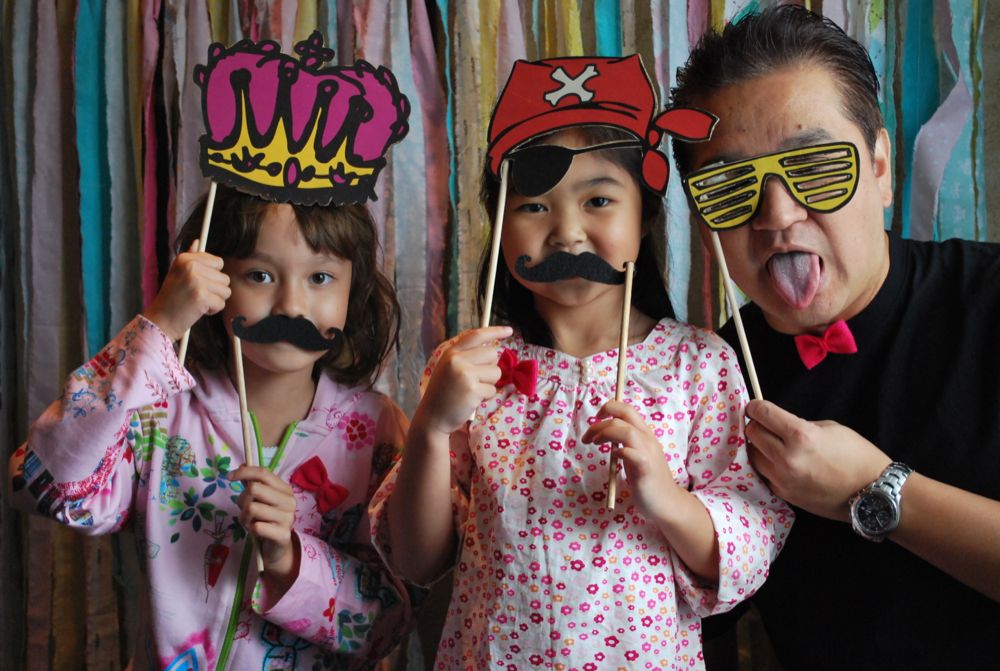
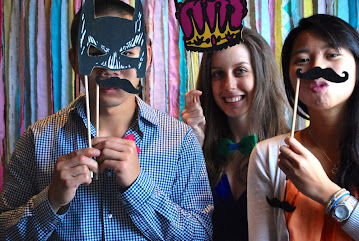
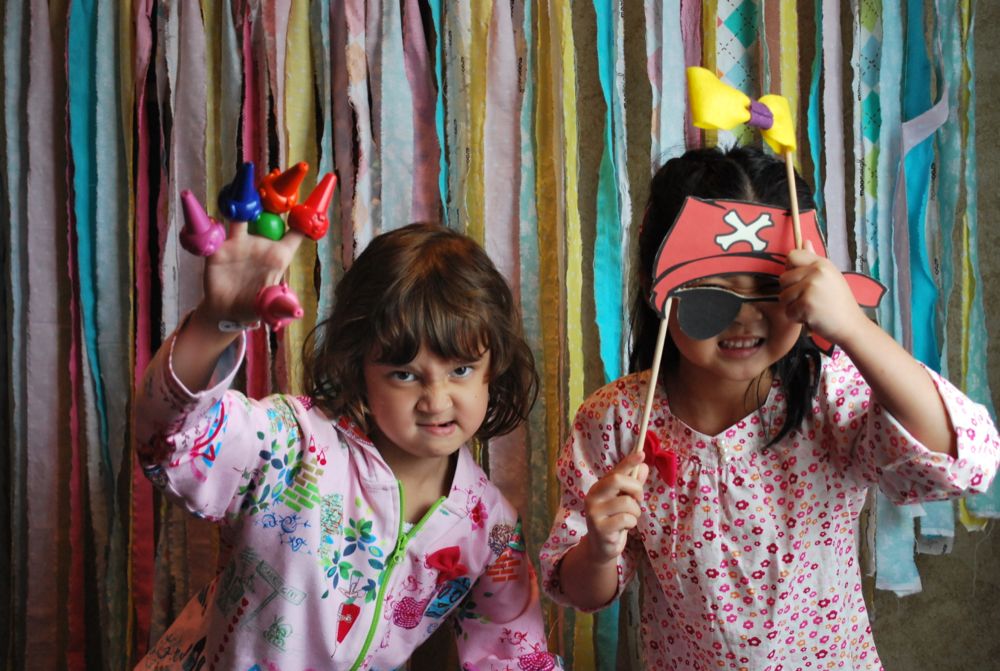
The photo booth props


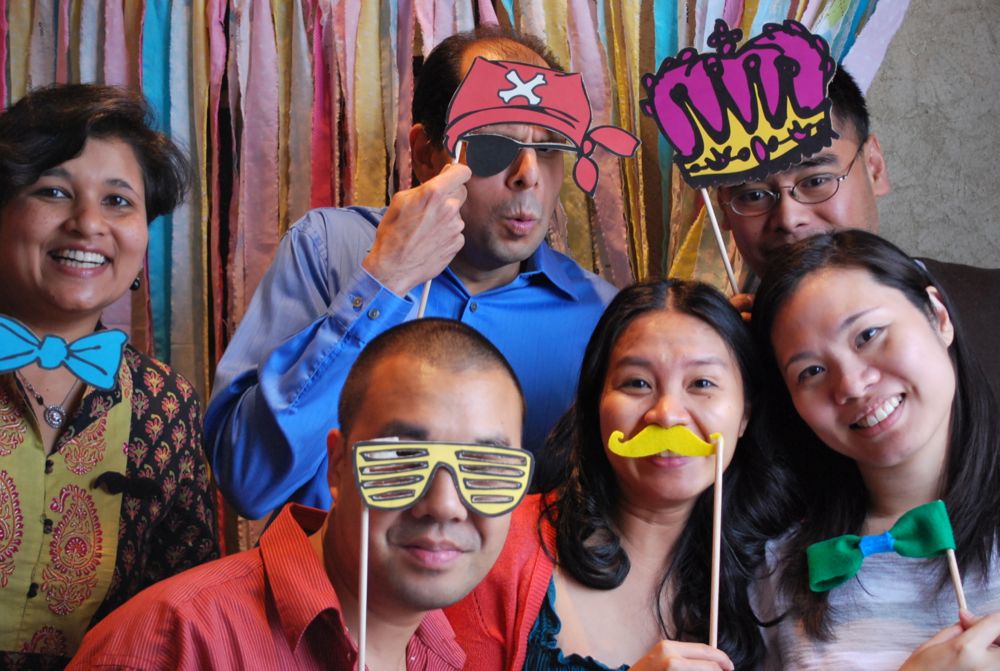
For the mustache  and bow:
1. Mustache - trace a mustache on a piece of felt. Cut out the mustache. Can print mustaches from catch my party.
2. Bow - Cut out a strip of felt (6 inch long by 1 inch width). Fold both ends so that they touch each other in the middle of the strip. Glue them down with glue gun or fabric glue.  Pinch the middle of the strip. Cut out another 1 inch width 4 inch length strip and wrap around the middle of the other felt piece. Glue it down. You can also follow this tutorial to make a fancier one.
3. For both mustache and bow, spray a fabric stiffener and place them in the microwave so that they harden.  Follow instructions on fabric stiffener bottle. 
4. Hot glue them on dowel.

For the other props (crown, eyeglasses, crown), download and print images  from oh happy day and follow the super easy instructions on how to make them. 


Mini pillow ornament


Refer to my post on how to make a mini name pillow ornament.


"You are Loved always" wood quote for guests to sign
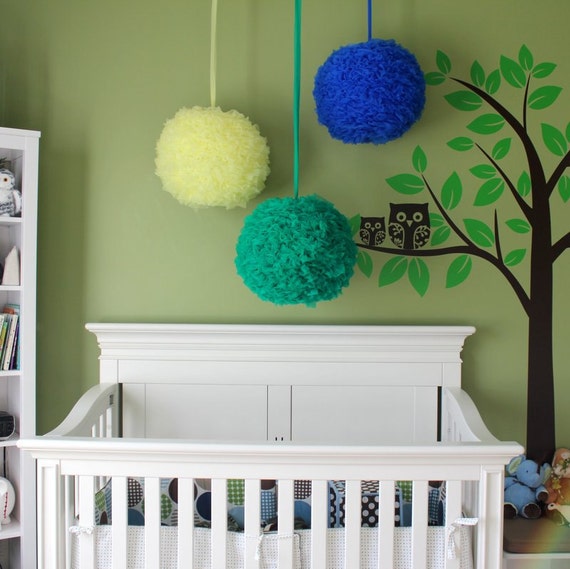

Take a look at my post you are loved for how I made the sign.


Pom Poms


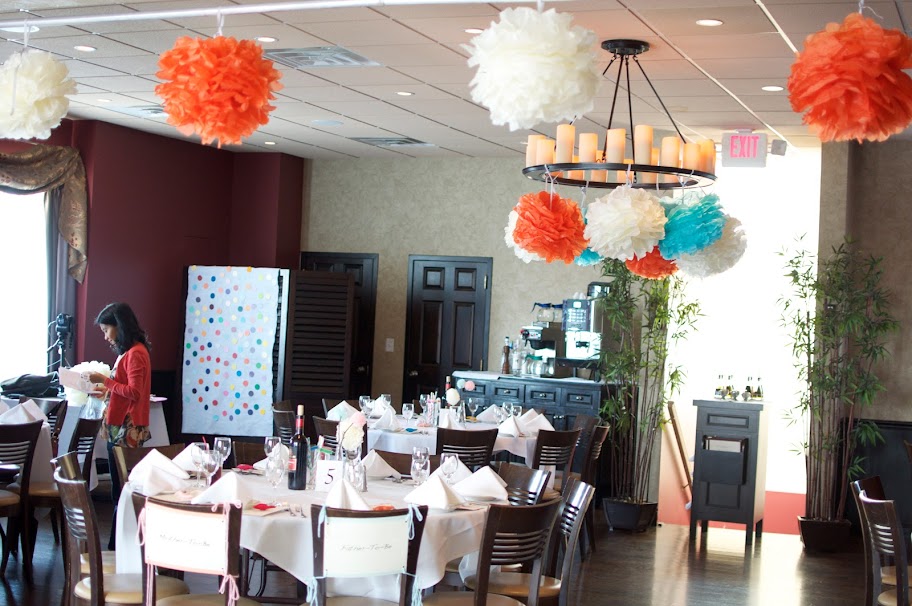
I didn't do the pom poms for my baby shower, but I did some for my friend's. You can also buy them folded up already from Martha's Stewart, Michaels and other craft stores, and fluff them out yourself.  However,  it's very easy to make and cost maybe $2 each. Buy your strings and gift bag tissue paper at a 99 cents store. You can actually make two pom poms from one bag of tissue paper, depending on how full you want it to be. 

Here is a great tutorial on how to make them. She's making a small pom pom flower, but to make a big one  you just need to use gift bag tissue papers. 

You might also find this tutorial from martha stewart helpful.

Dots photo booth backdrop:


Follow these three steps:

1. Get free paint swatches from your favorite paint or home improvement store. 
2. Use a hole puncher (2 inches) and make circles out of the swatches. 
3. Glue them on a piece of fabric. Here I used a felt fabric, but you can put it on whatever you want. 


Sweet Baby...

BOY!

The cake at our baby shower says we're having a boy! OH BOY!


95% of our guests had it right. The other 5% were still happy because they get to eat the cake either way.


Here are some details on how our gender reveal baby shower came to be and the PARTY itself. Lots of fun. 


At our 20th week ultrasound we asked the technician to write down what we're having on a card that we provided her. She then sealed it in an envelope. We weren't sure if we wanted to have a baby shower, but the option was there to have a gender reveal party. Our friend, Priscilla and Cecilia, wanted to give us a baby shower so Mr. T and I decided that maybe we'll turn it into a baby gender reveal/baby shower. Now that it's been decided we contact our friend, Joyce, to see if she can make us a cake. We held on to the envelope until my 27th week then we gave it Joyce to make the cake with either pink (for a girl) or blue (for a boy) filling. After the gender reveal at the baby shower she gave us back our card. This is what it said:


Our friends along with our family contributed to the party. Lots of work, especially on the part of Priscilla, who was the host and put everything together. Party turned out perfect, even with the cloudy weather outside. 

The decoration has a bunting theme because I love how festive and whimsical it looks. My color theme was fuchsia and teal. Jean created the amazing invitation, menu, banner, the favor bag tags, and "mommy-to-be" and "daddy-to be" signs that were hung on the back of our chairs. 


Bunting invitation

"Mommy-to-be" sign that was hanging in the back of my chair


"Daddy-to-be" for Mr. T's chair

our cake table


I connect the cake banner along with the chair signs together and hung them over our bed. When he gets his crib, we'll put the banner above it.  
Our Macaroon favor bag tags

When our guests arrived, they wore a mustache pin if they think it will be a boy; a bow pin if they think it'll be a girl.

boy or girl pins

This is the sign that guests signed for the baby. I will have other family and friends who weren't able to be at the baby shower sign it before I seal it and hang it up. 
"You are Loved always" guest sign

Joyce made this great bunting cake for us. Aren't those toppers adorable?

Gender Reveal cake made by joyce
 When it was time to cut the cake, all the "mustache" guests were on one side of the room and the "bow" guests were on the other side. The little kids, especially the girls, stood in front of the cake so they could tell everyone what color it is. They were more excited than we were. Here's a picture of Mr. T and I after the cutting of the cake. If you look carefully you can see the blue filling. 


Mr. T and I after slicing our BLUE velvet cake!

We had a lot of great gifts from our family and friends, but one of my favorites would have to be this diaper cake made by Anny and her cousin, Gippy. It would make a great REAL cake. My father thought it was a real and told my mom to put it in the fridge so that it doesn't melt after they take it home. 


"What will it be?" diaper cake.

"ten little fingers, ten little toes, what will it be? nobody knows"
We also had a photo booth. Mr. T and I love looking at these. We had a lot of people that love us. We're so glad they were there to share this special day with us. Our baby boy will have many wonderful people in his life.


Monday, September 24, 2012

Week 30


Baby fruit size comparison: large cabbage

Baby weight: 2.5-3.8 lb.

Mommy weight: 106 lb.

What's up with baby this week:  Baby is now strong enough to grasp a finger. Brain continues to develop. Brain is wrinkled to make room for more brain cells. 

Maternity Clothes: light jacket, khaki and tank tops, sneakers. 

Sleep: Waking up every two hours for bathroom. 

Breathing: Same as previous weeks.Shortness of breath while lying down in bed or sitting back on the sofa. 

Worst moment this week: They say pregnant women experience strange vivid dreams during this time due to anxiety. Boy did I have one. I dreamt my dog, Pippy, was killed by an alligator, that was kept as a pet by my brother in our apartment. It scared me because I love my dog. What's scarier is why is my brother living with me in our one bedroom apartment?! With an alligator?!!! And my apartment was full of water!!!! 

Interpretation of dream:  My water broke and the baby is the alligator. Alligator is taking all of the doggie's attention and she disappeared. Still confused about the brother! There is no way my brother is living with me and taking care of my baby!

Movement: Lots of hiccups and acrobat movements. 

Cravings: Beef Stew, Vietnamese soups. 

Labor Signs: Think I'm experiencing Braxton Hick's contractions at least once a day. Having mild cramp in my lower back, around the sides and under my belly.  My stomach also gets rock solid. Most of the time it happens when I'm walking. When I rest the stomach "soften" and the cramps subside.

Mood:  Tired more often. Taking more naps. The nauseous feeling from the first trimester is coming back when I'm hungry. Anxious. Ten more weeks to go! YIKES!

Looking forward to: Second detailed ultrasound of the baby this Friday. Mr.T and I are having our baby shower Saturday. Will be lots of fun. 

Note: Baby status based on The bump.


Friday, September 21, 2012

Happy Friday.

This post is dedicated to things that make me smile. My new obsession is trying to see how many ways pallets can be recycled. I LOVE the CRADLE! How pretty is that?!
Photo from inthralld


Photo from apartment therapy
Photo from design sponge

Ikea has clean, smooth pallets that come in variety of sizes. Wonder if they will let me pick them up for free. hmmmm... 

Tuesday, September 18, 2012

Making room for baby

Photo from my sweet nest

Baby is coming soon and it's time to make some room for that little human being that needs so much.

We are having the baby in our bedroom- the only bedroom there is :)

In preparation for baby, we have already revamp two IKEA Rast chests to store baby clothes. Currently they store my maternity clothes, fabrics, and some baby stuff that I made. Pack N' Play playard from our registry was purchased by a family or friend so I've decided to put that next to our bed since it has a reversible napper and changing pad. We need to organize our apartment for some other baby stuff so on to the internet I go. Below are some gears to help organize our space for all the baby stuff.


1. Prince Lionheart Diaper Depot Clear from amazon.com


photo from my sweet nest
2. IKEA PRESSA hanging dryer 
Photo from Ikea


   3. Book shelves with Ikea spice rack - Needs some time, paint, and spice racks to make these side book shelves.
Photo from on the banks of squaw creek

4. Underbed storage for storing almost everything you don't need (winter clothes, holiday decorations). 
Photo from amazon.com

5. Space bags  and tote - Store more of everything when you use these vacuumed bags and then putting them in you closet or under the bed. 

photo from amazon.com


6. Over the door shoe organizer - can be used to store arts and crafts products, baby lotions/shampoos, baby clothes (socks, hats, mittens, etc.), baby bottles, etc. The list is endless. 


photo from babble.com


7. Extension shower rod and baskets to store all your bathing needs - love this idea from life hacker

photo from life hacker
8. This is a genius idea; using every inch of the room for storage.  


photo from Bellini


Monday, September 17, 2012

Mobile, mobile, mobile...

Reasons to have a nursery: decorate, decorate, decorate. Today I did a sign and now I'm thinking mobile. Actually, been on my mind since January when I was planning my friend's baby shower and came upon this beautiful mobile on Etsy.

Photo from Maisie Moo etsy shop 
Looks simple enough. And I have leftover elephant favors from the baby shower so it should be as easy as 1-2-3.

Of course, during my search I found some other wonderful easy DIY mobiles. Which one is your favorite?

Photo from pinterest

Photo from chic & cheap nursery
Photo from sew she sews
Photo from run with scissors
Can be made ultra cheap if you get some free paint swatches from  paint store, free twine from Ikea and free twig from the neighborhood tree/park. 
Photo from gus and lula
Photo from made by joel
Photo from sculpted light

Photo from pour mes jolis momes


Photo from bell bloom design etsy shop


I love them all. I might end up making more than one mobile!